Building a PBX system
As a part of my new job I was asked to pickup Asterisk to build a working PBX system (which would then later get a securty and privacy overhawl).
As I have some experience with this working in various ISPs over the years, I set about getting started.
I know ‘most’ people would want to build this in the cloud but being a ‘penniless nobody’ I set about building this locally which would later lead to some hilarious testing shenannigans, cloud can always come once a solid base and understading has been established.
Prerequisites
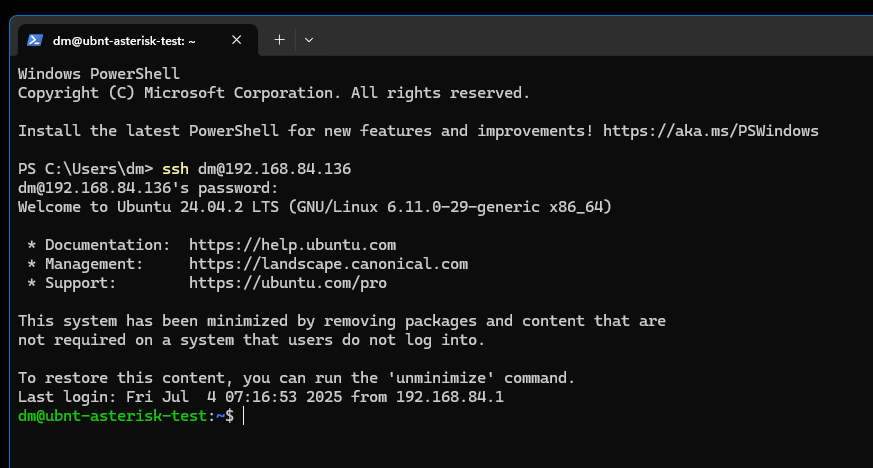
I knew going into this I would need somekind of server running as well as a client, I figure my machine local can be the client as I can install software like MicroSIP to dial out and as such I decided to grab a copy of Ubuntu Server because it’s what I am most familiar with.
A quick and dirty 2 core / 4GB / 24GB server build later and I can SSH into it from my local machine (so set the VM going and minimise/forget about it till done).
Now that the connecting part is out of the way I set about reading the Asterisk Documentation and getting the server updated a-la:
1
2
apt update
apt upgrade
Installation
Moving on to the installation of Asterisk, this is actually pretty straightforward and I am borrowing the commands (but updated) from hotkey404.com
1
2
3
4
cd /usr/src
wget http://downloads.asterisk.org/pub/telephony/asterisk/asterisk-22-current.tar.gz
tar zxvf asterisk-20-current.tar.gz
rm -rf asterisk-20-current.tar.gz
To walk though this you are navigating to /usr/src, downloading the latest version of asterisk (at time of creation 22) and then untarring it (unzipping it) and then removing the downloaded .tar.qz (zip) archive.
Then we move onto actually installing Asterisk, to do so you need to install some prerequisits first:
1
contrib/scripts/install_prereq install
And then run your configuration (you can edit this beforehand however I went completely stock which means running everything as defaults and crossing your fingers).
1
./configure
Now if that finger crossing worked you will have successfully installed Asterisk if you see something similar to this screen:

(Yes it is named differently, I killed the first server from this image by accident but forgot to grab a new picture for the 2nd server).
The next thing you will want to install is a firewall, beleive me they are important and for the purposes of my testing we are using IPTables which is a simple Linux Firewall and again guide parts borrowed from dev.to and voip-info
1
apt install iptables
You will want to also make sure that you add these specific entries into it to allow asterisk to ‘work’ properly (and yes you can really knuckle down this firewalla and allow or disallow exactly what you want).
1
2
3
4
5
iptables -A INPUT -p udp -m udp --dport 5060 -j ACCEPT
iptables -A INPUT -p udp -m udp --dport 4569 -j ACCEPT
iptables -A INPUT -p udp -m udp --dport 5036 -j ACCEPT
iptables -A INPUT -p udp -m udp --dport 10000:20000 -j ACCEPT
iptables -A INPUT -p udp -m udp --dport 2727 -j ACCEPT
Now this is out of the way (and configured the firewall already) lets move onto the ‘configuration’ of Asterisk
Configuration
Now that we have made it past installing Asterisk and running the initial config, we can run the installer and select additional options, functionality, the codecs and applications (if any)
Accordingly we can run:
1
make menuselect
This will display the Asterisk Module and Build Option Selection menu:
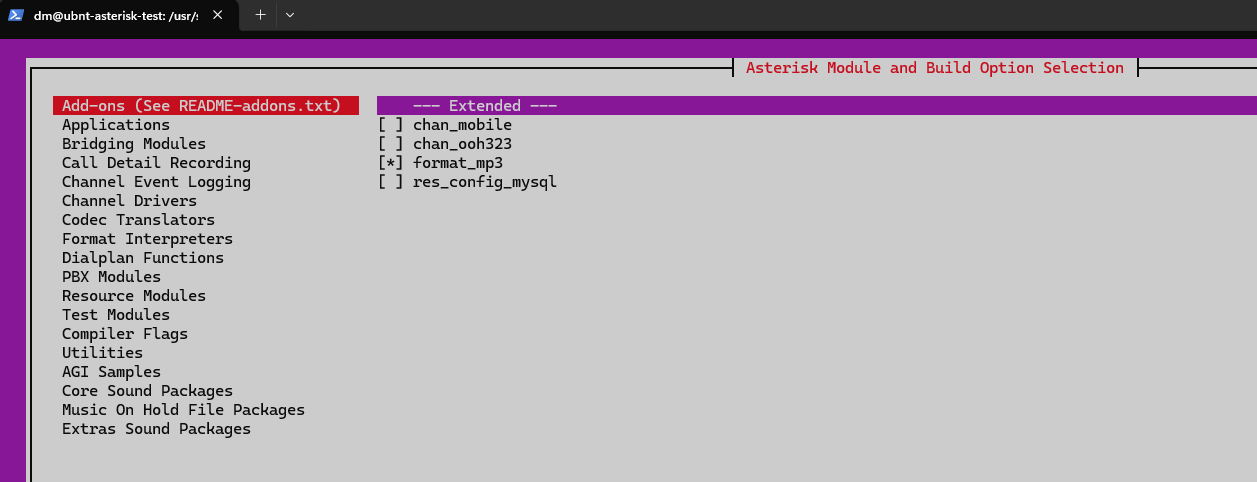
As you can see here I have selected the format_mp3 option which will (once installed) save calls to the MP3 format.
This was actually the only thing I changed here so if you tab to save and exit at the bottom it will save the changes you made.
Now we need to run make and get building:
1
make
This will take some time to run so do not worry if it is taking a while, once it completes and returns you to the directory you need to run get_mp3_source.sh script located in the contrib/scripts directory. It will download MP3 sources and the necessary libraries to support the MP3 format. It works as follows:
LAME sources: The script downloads the sources of the LAME utility, which is used to encode and decode MP3 audio files.
Download MAD Sources: MAD (MPEG Audio Decoder) is a library used to decode MP3 files. The script downloads MAD sources.
Source Compilation: After downloading the LAME and MAD sources, the script compiles these libraries.
Library installation: Once compiled, the script installs the libraries on the system. This allows Asterisk to use these libraries when handling MP3 audio files.
MP3 is a copyrighted format, so sources and libraries for its support are not provided with Asterisk.
You can run it with the following snip of code:
1
contrib/scripts/get_mp3_source.sh
Once complete we can run make install and get this party going:
1
make install
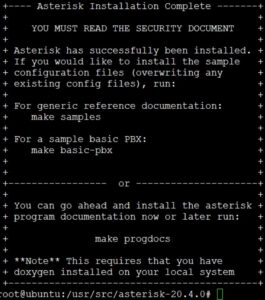
Once complete you will see a screen similar to this:
Now onto the fun part:
Testing
This section had me in stitches trying to figure out how to call from one SIP to another.
Handily man created virtual machines and I rememebered I have one floating about.
Now an interesting thing to point out here is that since we did a complete base install of Asterisk with no changes we have some stock credentials stored in it.
These are what we will use to log into the SIP system and also call eachother for testing purposes.
To access this (as well as starting the services in a moment) we need to navigate to the Asterisk directory:
1
cd /etc/asterisk
Once here we can open the pjsip.conf and view the details, alternatively if you were an Administrator for the system you would go in here to change add or remove users from the system.
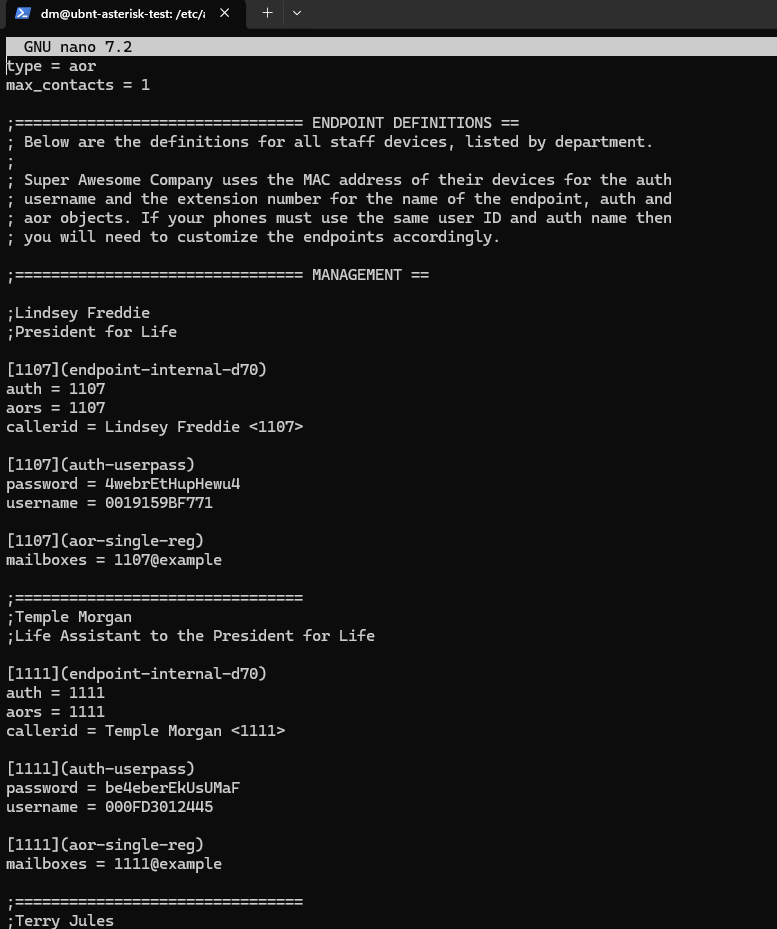
See lots of details for made up people.
So now let’s get Asterisk switched on and working for us.
The following commmands need to be ran one time to get things up and running and then again when you make changes:
1
2
3
4
5
6
asterisk -r      ## go to the CLI of Asterisk (command line interface where you will run the following commmands)

core reload      ## reload pjsip and modules
dialplan reload      ## reload dialplan
pjsip show endpoints      ## showis the endpoints you have (if multiple)
There are also some simple commands to remember when interacting Asterisk (and yes to can auto on/off etc but that’s for another day)
1
2
3
4
systemctl start asterisk      ## Starts Asterisk
systemctl status asterisk      ## Checks Asterisk Status
systemctl stop asterisk      ## Stops Asterisk
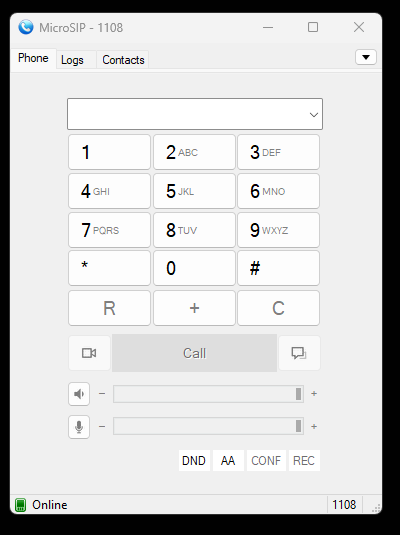
So run that Start Asterisk and now with things up and running let’s log into MicroSIP and get working.
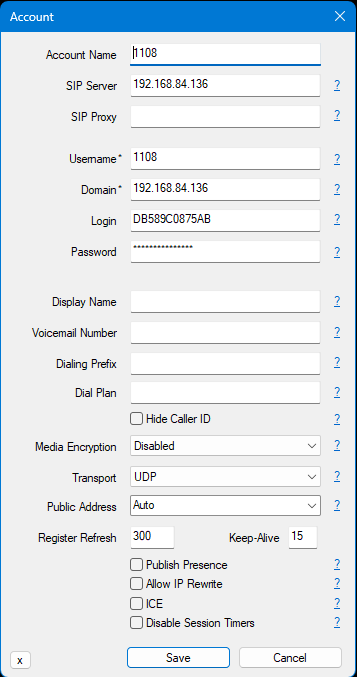
The following details were used:
1
2
3
4
5
192.168.84.136 - Server IP
username: 1108 - Caller ID
domain: 192.168.84.136 - Server IP (again)
login: DB589C0875AB - User Login for 1100
Password: KAthufrudE6uyAs - Password for 1100
Entering these into MicroSIP under ‘add user’
And Voilla, logged in and registered:
Now I had to try calling from one to the other so here is an example video I got when playing around with a VM:

(Aww you can see my notes in the background too lol)
All in all a very fun learning experience, took me back to watching the call queues during a large outage at a place I worked once.
There were 3 Trunk queues and as things took off and I saw 200 in each queue I bust out my phone and shot a quick video of them all hitting 300, 350, 400, 499 and boom the system went down.
Absolutely nothing got done for the rest of that day.
Be safe all, working on some things in the background, may have some networking and cloud certs to be hammering thorough soon but I want to be able to share parts of that journey too.
Peace
🤙
I don’t have any sponsors or anything but if you enjoy my work, or feel sympathy for my wife, then I have set up a Ko-Fi account as well as a BuyMeACoffee people can donate to.