Kubernetes - from someone who has 12 whole hours experience
2025-11-01The other day I while having one of my usual mid career crisis’ moments I recalled that I wanted to know more about Kubernetes.

It’s a niche topic, companies are paying top dollar for people who know how to use it so I figured I would invest an hour or two of my time nailing down some of the basics.
A slight spoiler for this is I already have ‘some’ experience with Kubernetes, not much, but I am familiar with some commands and interactions.
So I wrote down short list:
- How do I set up a multi node cluster?
- How do I run a web app on Kubernetes?
- Extra Mile: Can I run AI on it?
It was at this moment the YouTube algorithm gods pushed me a recommendation and I couldn’t turn it down.

He was a nurse that pivoted into DevOps and is helping others along the way, awesome.
This video served as a guide on getting a simple web app up and rolling so I figured I would try to replicate it.
“But Dan(?)” you ask, “You don’t has any Raspberry Pi’s to hand and your laptop has a hardware fault that nukes the OS every few days, how are you going to do that”
Quickly dear reader.
The answer is, very quickly.
Initial issues building VMs
In the process of trying this the laptop folded in on itself and I lost my VMs… Trivial, but a setback non the less.
I settled on Ubuntu server as I can happily run it headless (so no GUI) and they can siphon off very little computing power to get rolling.
One thing I did learn when provisioning machines is ‘dont just set them to 1 CPU and 1GB RAM’ right off the bat, otherwise you will run into errors like this:
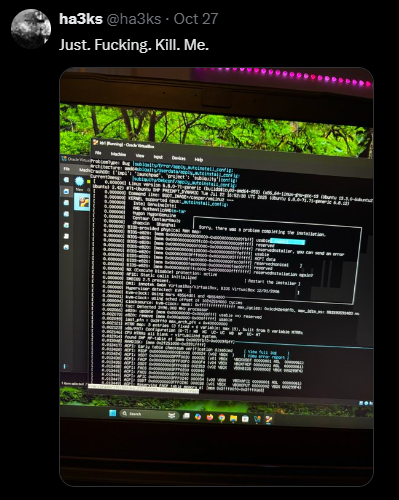
Yeh, that was my fault.
It took me longer then I am willing to admit, but that was the issue so I gave the VM(s) 2 CPU and 4GB of RAM that I could later tone down but, actually, I just left it and let it roll which seemes to have worked out for the better.
Make sure your ‘Host’ machine or ‘Homelab Sever’ is ALWAYS big and beefy - go into debt if you have to. (This is a meme moment, please don’t go into debt)
Once one machine was up and running and aptly named ‘kb1’ I set up ‘kb2’ and ‘kb3’ making a 3 node cluster.
Configuration of VMs
Now using my big wrinkly brain and the Youtube video above I was able to configure ‘kb1’ as the controller and then ‘kb2’ and ‘kb3’ would be nodes that connect to ‘kb1’.
The setup process was suprisingly easy, as per the video (and in this case I am using K3s) go to k3s.io/ and you can run the quickstart that is literally in the banner up top:
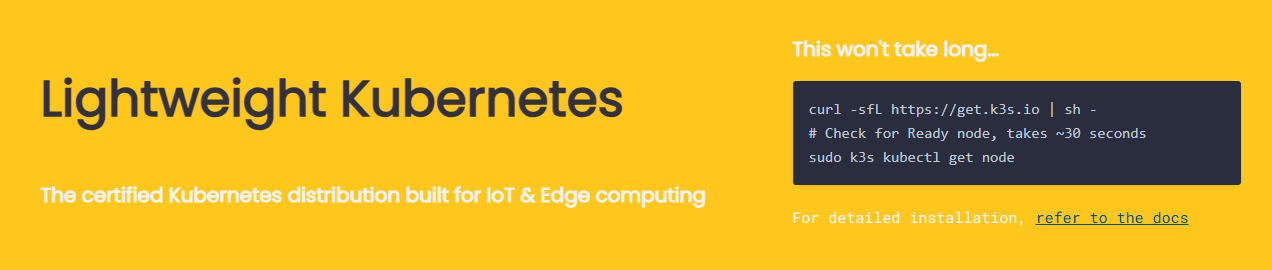
curl -sfL https://get.k3s.io | sh -
This will get your initial controller up and going, if you are a nerd like me and during the setup of Ubuntu server you enabled SSH (but didn’t add a key because YOLO) you can SSH into your ‘kb1’ and run the command which will install everything. Make sure your hostname on your main controller matches:
dm@kb-01:~$ hostname
kb-01
Once one is up and running, getting the others going is relatively straightforwards you just need to check the documentation (quick start guide) for setting up a node;
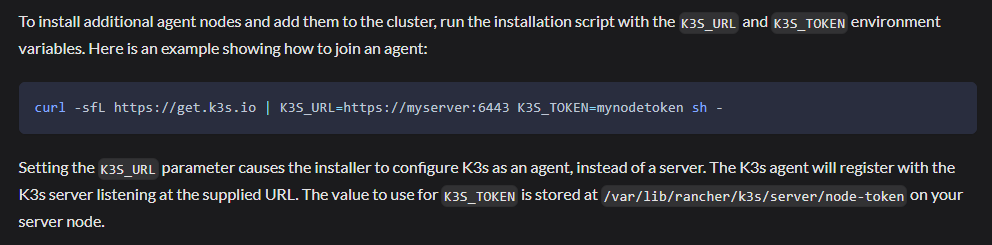
The command being:
curl -sfL https://get.k3s.io | K3S_URL=https://myserver:6443 K3S_TOKEN=mynodetoken sh -
Now there are some important changes, obviously, it is doing the same curl to grab the files from k3s.io BUT it is going to get the configuration file from your local ‘kb1’ (default server port is 6443) as such you need to enter the ip address for that machine as well as grabbing your K3S token from that machine.
Handily the code to output the token file is:
cat /var/lib/rancher/k3s/server/node-token
In my case the outout was
dm@kb-01:~$ cat /var/lib/rancher/k3s/server/node-token
K104cc460e12aff973b5a7d17aa85c8e54614093193bafbde946c44aad567b81ea8::server:2228d1bb88e07aa59f637bbd34f1b4a5
So, alltogether on each of my nodes you would be running:
curl -sfL https://get.k3s.io | K3S_URL=https://192.168.4.131:6443 K3S_TOKEN=K104cc460e12aff973b5a7d17aa85c8e54614093193bafbde946c44aad567b81ea8::server:2228d1bb88e07aa59f637bbd34f1b4a5 sh -
Which downloads the files from the web, gets the configuration from your local control-pane or master ‘kb1’ and bippity boppity you have 2 nodes connecting to your master.
Now you can ssh into ‘kb1’ again and see them running with the get nodes command as per below:
dm@kb-01:~$ kubectl get nodes
NAME    STATUS   ROLES                  AGE    VERSION
kb-01   Ready    control-plane,master   4d7h   v1.33.5+k3s1
kb-02   Ready    <none>                 4d7h   v1.33.5+k3s1
kb-03   Ready    <none>                 4d7h   v1.33.5+k3s1
Now that we have our cluster, we need to put it to work.
A Fist Fight with YAML
For those who don’t know Kubernetes uses YAML files for its sets of instructions, YAML stands for Yet Another Markup Language.
I would be following the video to the letter to get a nice little web app up and running so I was going to be installing LinkDing
LinkDing is a bookmark manager that you can run on your Self Host and synchronise bookmarks between browsers and devices… pretty neat.
Accordingly I paused the video and copied the code, word for word… or so I thought.
I am going to paste my origional note here so you can see what happened:
apiVersion: v1
kind: Namespace
metadata:
 name: linkding
---
apiVersion: apps/v1
kind: Deployment
metadata:
 name: linkding
 namespace: linkding
spec:
 replicas: 1
 selector:
  matchLabels:
   app: linkding
 template:
  metadata:
   labels:
    app: linkding
  spec:
   contaiters:
   - name: linkding
     image: sissbruecker/linkding:1.44.1
     ports:
     - containerPort: 9090
Yeh, you can see it can’t you, damn experts…
When runing the code initially I was met with a confusing amount of various errors:
- “Unknown field in spec.template.spec.contaiters”
- “error converting YAML to JSON: YAML: line blah blah blah”
- “Mapping values not allowed in this context”
I made subtle tweaks and changes to the code, resulting in different errors, many visits to Stack Overflow, Google and other search engines with half baked in AI.
I elected to not actually use AI in this project, partly due to the challenge of actually debugging and fixing the problem and partly because, if you havent noticed YOU are the training data that AI is using, everything you enter is recorded and logged and never deleted unless you take the time to jump through the hoops and actually find the option to permanently remove your data… Dont make the ‘systems’ job easier by feeding it everything about you and what you want.
If I had the cash and the ability I would absolutely do a PewDiePie and set up a Self Host and do it all locally:

Lo, I am not rich and My laptop dies often as we all know so back to it
Flipping the table
After a few hours, like literally two hours, I decided to give up for now, I had done everything I can think of to get this thing up and running and it just was not budging, I had even used an online YAML checker as part of debugging which is why the error kept changing and that was coming back green saying ‘yeh this is valid YAML my dude’ so I decided to power off the cluster. Gather my thoughts on my notepad and take a break.
I had planned to do something that day and ended up getting it hammered out, watched some TV and played some games as a distraction.
Honestly that Game Pass Ultimate at £14.99 a month is a god send, though now it’s going to be £22.99 a month I really have to decide if it’s worth keeping or not, probably will mind.
Coming back fresh head
After the rest of that day of ‘relaxing’ I thought it might be fun to play on the laptop a moment, so I opened up ‘ol faithful and staring at me was the notepad…
There is was, staring me in the face like the end of ‘The Usual Suspects’:

A SPELLING MISTAKE
A SPELLING MISTAKE COST ME 3 HOURS OF DEBUGGING
The Rage at myself, and spellcheck, was able to be measured in that moment
Gah!
So, presenting the correct dep.yaml I made:
apiVersion: v1
kind: Namespace
metadata:
 name: linkding
---
apiVersion: apps/v1
kind: Deployment
metadata:
 name: linkding
 namespace: linkding
spec:
 replicas: 1
 selector:
  matchLabels:
   app: linkding
 template:
  metadata:
   labels:
    app: linkding
  spec:
   containers: # Yes the edit was here...
   - name: linkding
     image: sissbruecker/linkding:1.44.1
     ports:
     - containerPort: 9090
Then I ran sudo kubectl apply -f dep.yaml which would install and configure the app based on the yaml input..
Build complete..
It actaully did it!
Happy Dance moment if you please!
Now not to get too carried away you can check and make sure it is running by entering:
dm@kb-01:~$ kubectl get pods
No resources found in default namespace.
Shit.
It was at this moment that my debugging came back to mind, search for the answer and you WILL find it, lo and behold I can add --all-namespace and see everything running:
dm@kb-01:~$ kubectl get pods --all-namespaces
NAMESPACE     NAME                                      READY   STATUS      RESTARTS      AGE
kube-system   coredns-64fd4b4794-zf2dp                  1/1     Running     2 (41m ago)   4d8h
kube-system   helm-install-traefik-4jxdl                0/1     Completed   2             4d8h
kube-system   helm-install-traefik-crd-fqfr7            0/1     Completed   0             4d8h
kube-system   local-path-provisioner-774c6665dc-qk9kl   1/1     Running     2 (41m ago)   4d8h
kube-system   metrics-server-7bfffcd44-pd2rs            1/1     Running     2 (41m ago)   4d8h
kube-system   svclb-traefik-c8216a6a-29ntq              2/2     Running     4 (41m ago)   4d8h
kube-system   svclb-traefik-c8216a6a-8ttrg              2/2     Running     4 (39m ago)   4d8h
kube-system   svclb-traefik-c8216a6a-xggvm              2/2     Running     4 (40m ago)   4d8h
kube-system   traefik-c98fdf6fb-gtv4k                   1/1     Running     2 (41m ago)   4d8h
linkding      linkding-7d4c6f6dbb-nrk9c                 1/1     Running     1 (39m ago)   3d19h
Ah that’s better and look linkding is up and rolling, now we’re cooking on gas.
Now remember that name linkding-7d4c6f6dbb-nrk9c because we are going to need that.
Port Fowarding
Now we have a working and live webapp running, we need to be able to access it, turns out you can’t just type in the IP address to your browser and it will suddenly take you there, you need to set up a portforward so you can log into it and access it.
This process is relatively straight forward if you have a basic understanding of port forwarding so I will drop the commend I used:
kubectl port-forward pod/linkding-7d4c6f6dbb-nrk9c 9090:9090
So we are telling Kubectl (control) to set up a port forward of this particular app or pod and the name of it to a certain port we can access in this case 9090.
Running it gives little in the way of output as it is in a ‘running’ state, but when you try browsing to it then it will start to fill with logging:
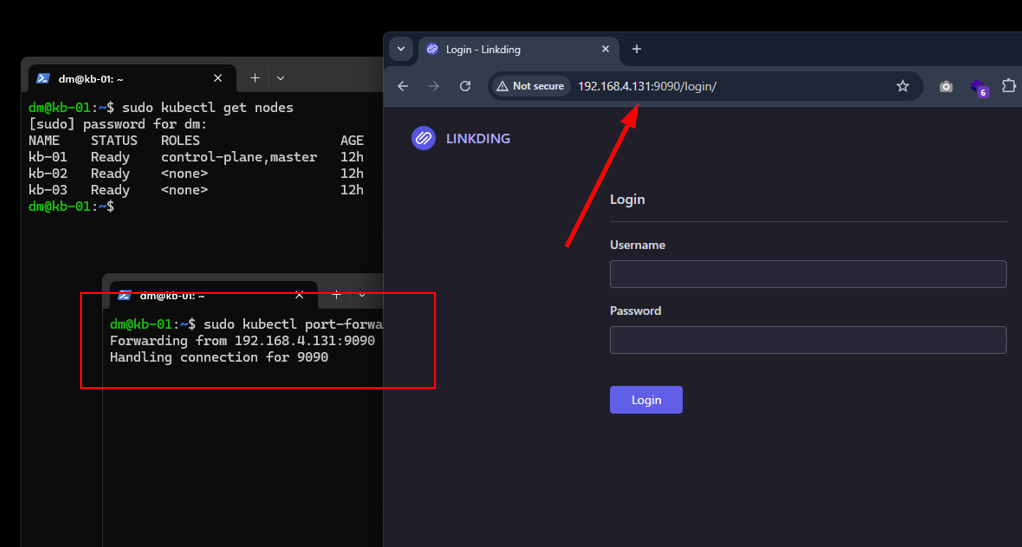
And just like that, we have a successful self host!
I have had some time to play with this and generally, I love it.
I can’t wait for future me to have money so that I can invest in some Self Host Loving and get a little server up and running with our Plex needs, networking labs, pentesting labs, Kubernetes Clusters and other things.

Honestly I would be happy with 3 Raspberry Pis and a simple NAS, I can assure you I would have headroom have network wide Ad Blocking and be able to entertain my family.
If you haven’t considered it before.. look into it. If my haggared laptop can survive long enough to not only do this lab but also survive the write up, you can do it too and learn something.
I didn’t quite get to scratch that Ai ‘extra mile’ off the list, but it is on the cards. It’s nice to have ‘project work’ in the background, I also have some certs to be studying for.. will see what happens with them.
Be safe all and I’ll see you in the next post.
🤙
I don’t have any sponsors or anything but if you enjoy my work, or feel sympathy for my wife, then I have set up a Ko-Fi account as well as a BuyMeACoffee people can donate to.